ProTag
Introduction#
ProTag is a proprietary application that facilitates management and tracking of all your company assets in an environment which is secure and efficient. All assets including software, hardware, equipment and spare parts can be managed, maintained, reserved, checked out and checked in from a single point of entry.
Getting Started#
Let's explore ProTag features from the very first page.
ProTag Header#
The header will always exist in every page. It contains shortcuts, asset lookup field, etc.

- Shortcuts of Assets, Licenses, Accessories, Consumables, and Components.
- Asset lookup field. Enter any asset tag to view asset information.
- Create new button, You can easily access the Create page of the following choices:

- Notifications. It notifies you items below or almost below minimum quantity levels.
- Profile settings. Containing features related to your profile.

- Admin settings.
Dashboard#
Here is the Dashboard interface:
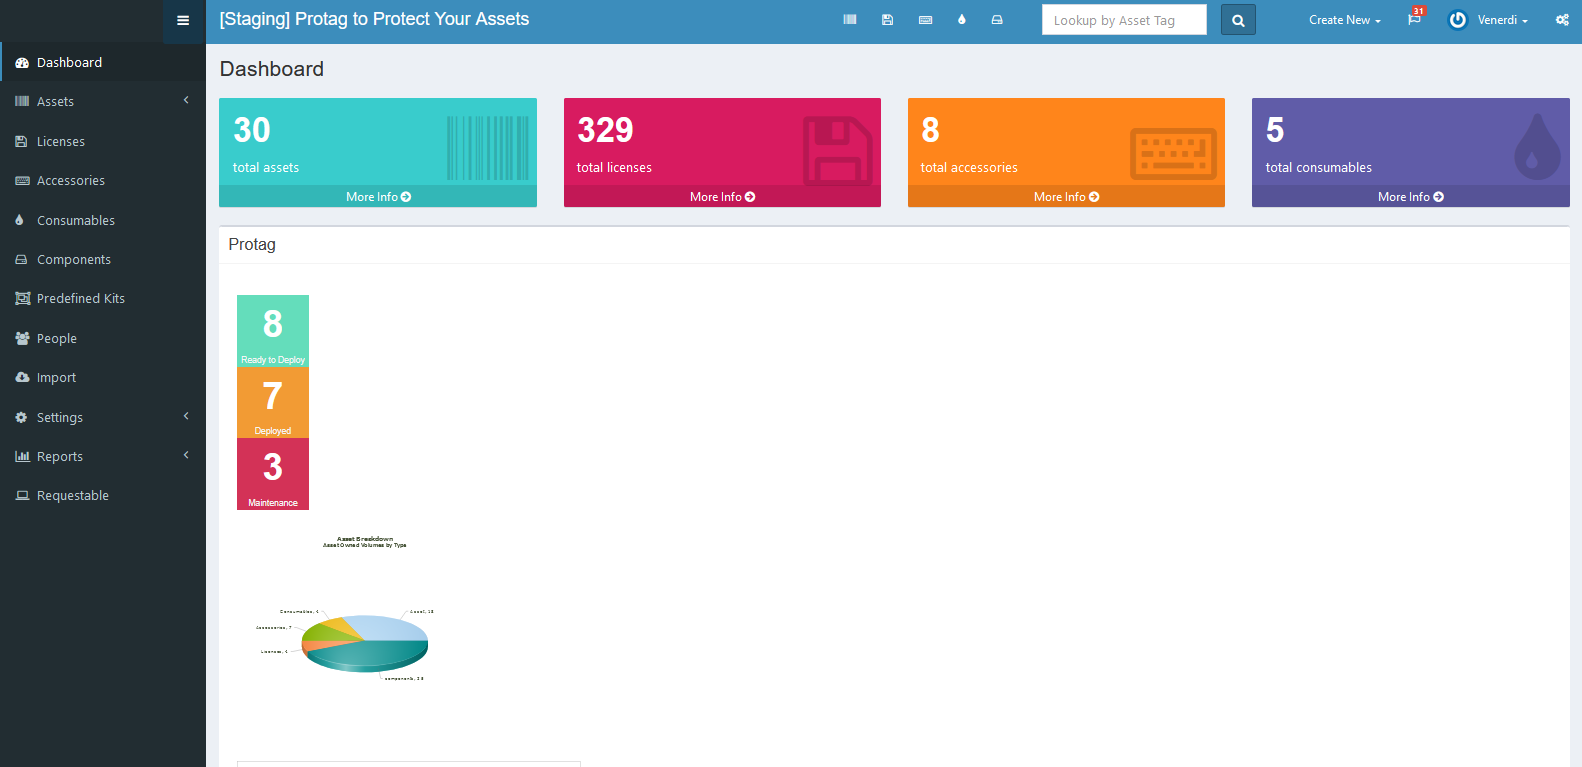
Dashboard page contains information and charts about the number of items in ProTag.
The first tab will show the total items in every group.

The second tab will show the total assets based on their status.

While the other tabs will show various charts about the number of items in ProTag.
Managing Assets#
Assets in ProTag are anything that have an asset tag. Asset tags are always unique, and are meant to be used with barcode labels affixed to the assets themselves. You can create assets manually from the application or add them from CSV by importing.
Creating Assets#
Users can create assets manually from the application.
Here is the Create Asset interface:
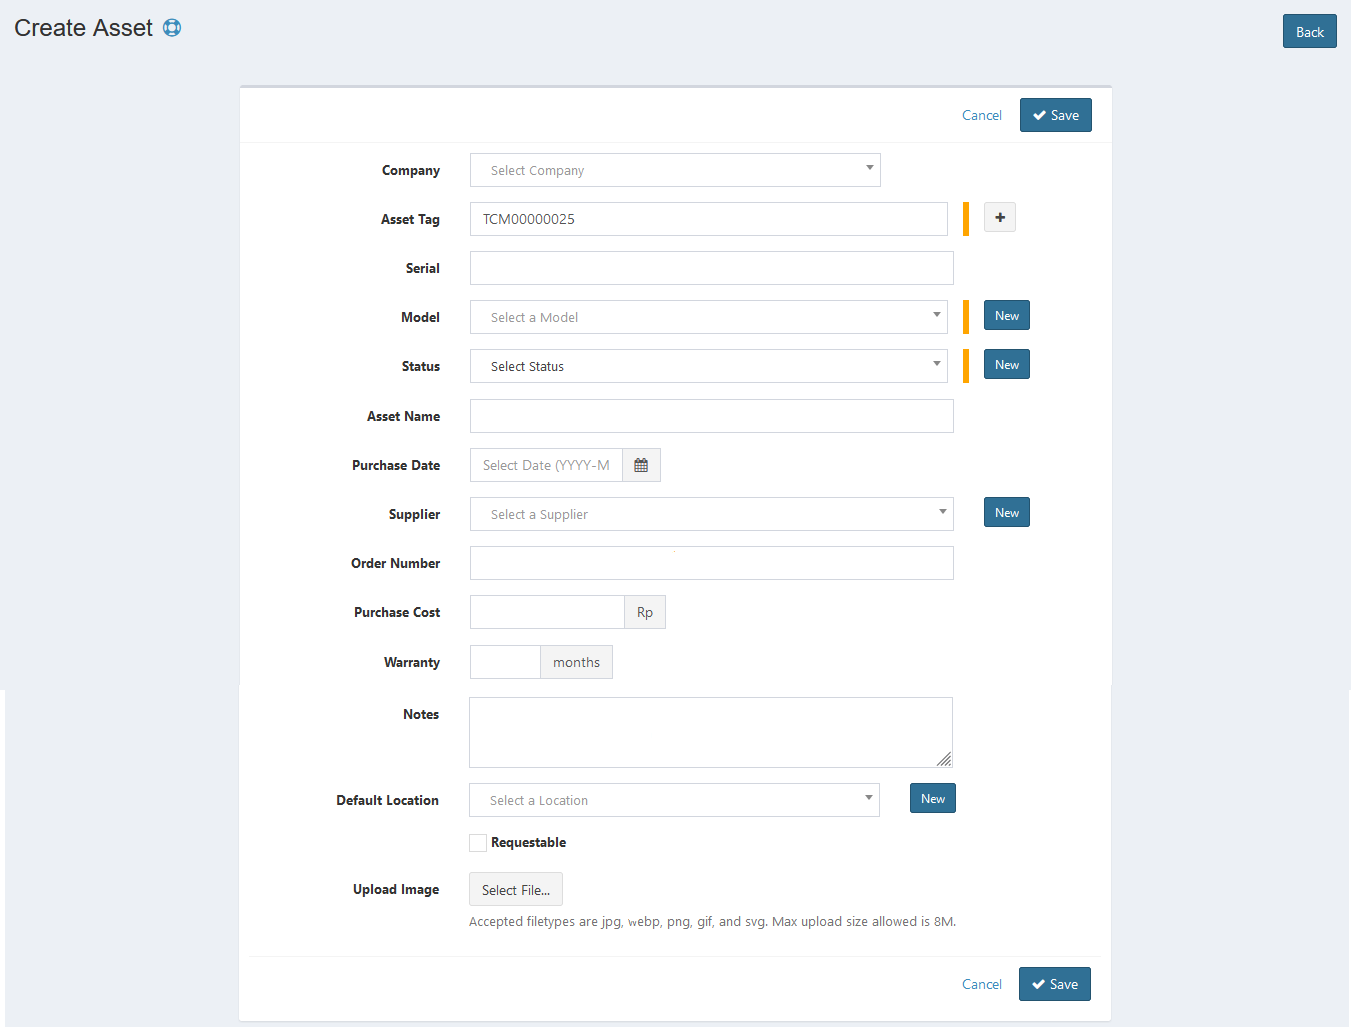
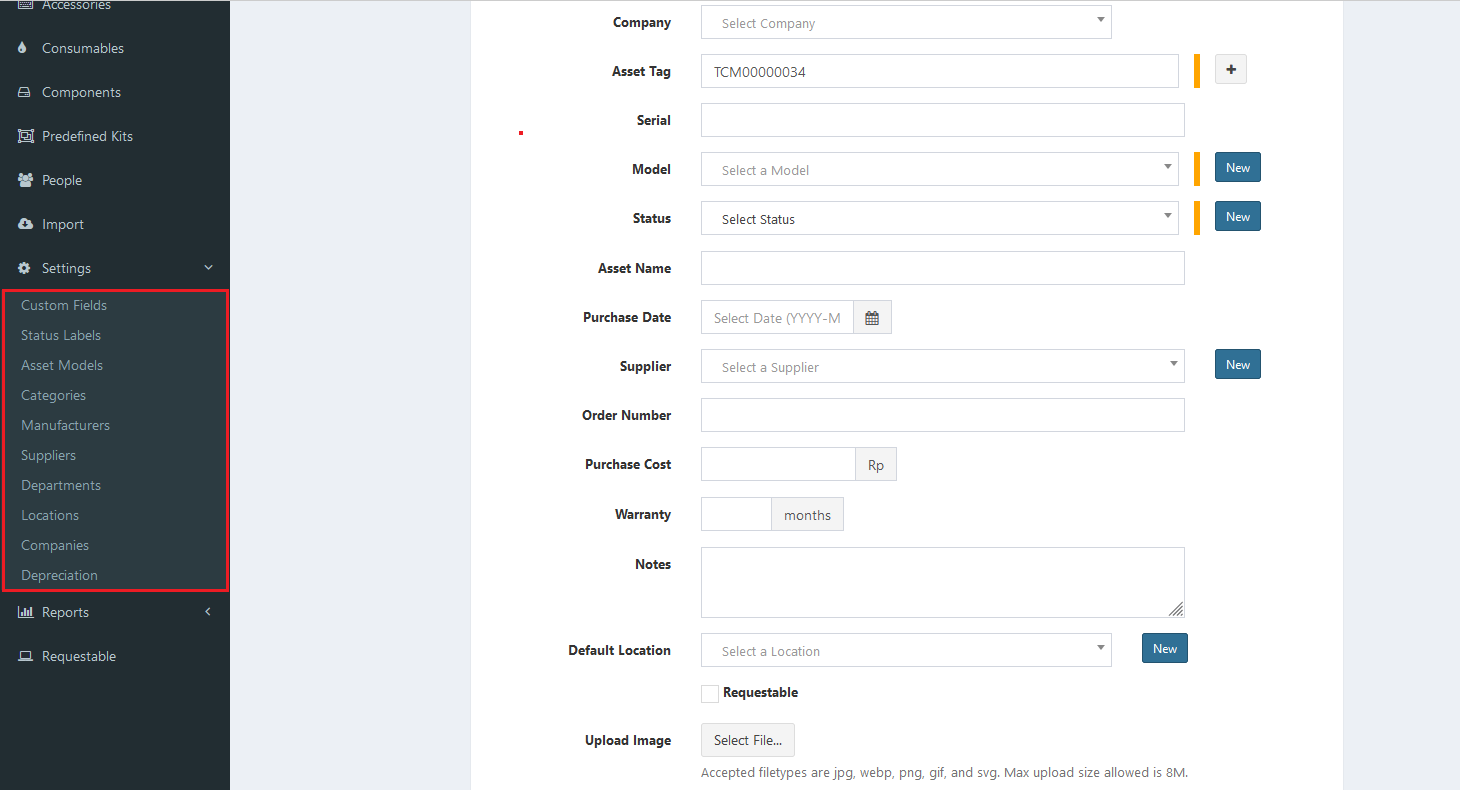
Assets have a set of required and optional fields. Some of them are select fields, which need to be set first in the settings section.
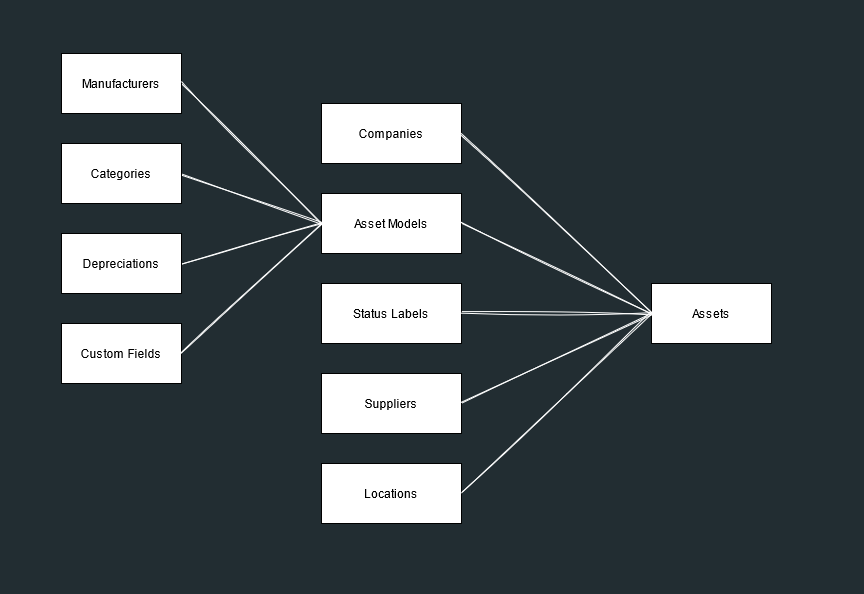
Here is a diagram as a step-by-step guide in setting up all the fields to create an asset with complete information:
Adding Assets from CSV#
How to best start adding assets depends on what information you have to start with. If you have an existing CSV (Google Doc, etc) with asset data in it, your first stop will be importing your assets through the Import tool. See the Import documentation for details.
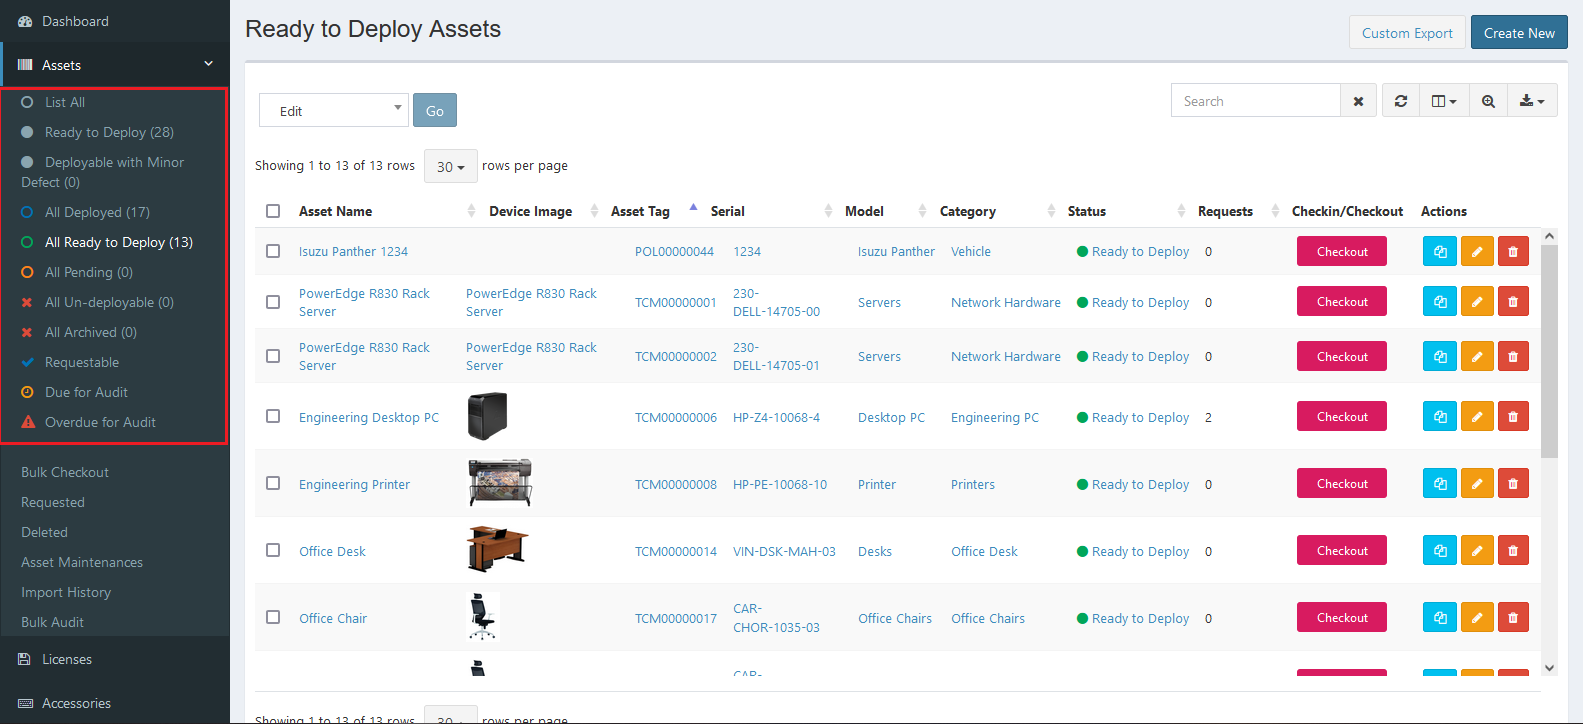
Sorting Assets#
The created or added assets will then be sorted to the list according to their status. You can manage this list in Status Labels.
Checkin and Checkout Assets#
Checking in and checking out are two primary concepts within ProTag. When you checkout an asset, license or accessory, you’re marking them as being in the possession of someone else. This means that they cannot subsequently be checked out to another person until they are checked back in. This prevents “double-booking” assets, where one asset has been promised to or assigned to multiple people.
When an employee leaves your company, or if an asset, license or accessory is not functioning properly, you would check it back in. Checking it back in indicates that it’s back in your possession, or potentially out for repair. It’s up to you to decide what status to assign it, based on the condition of the asset.
For futher details and steps about checkin/checkout, you can see Asset Checkin and Checkout documentation.