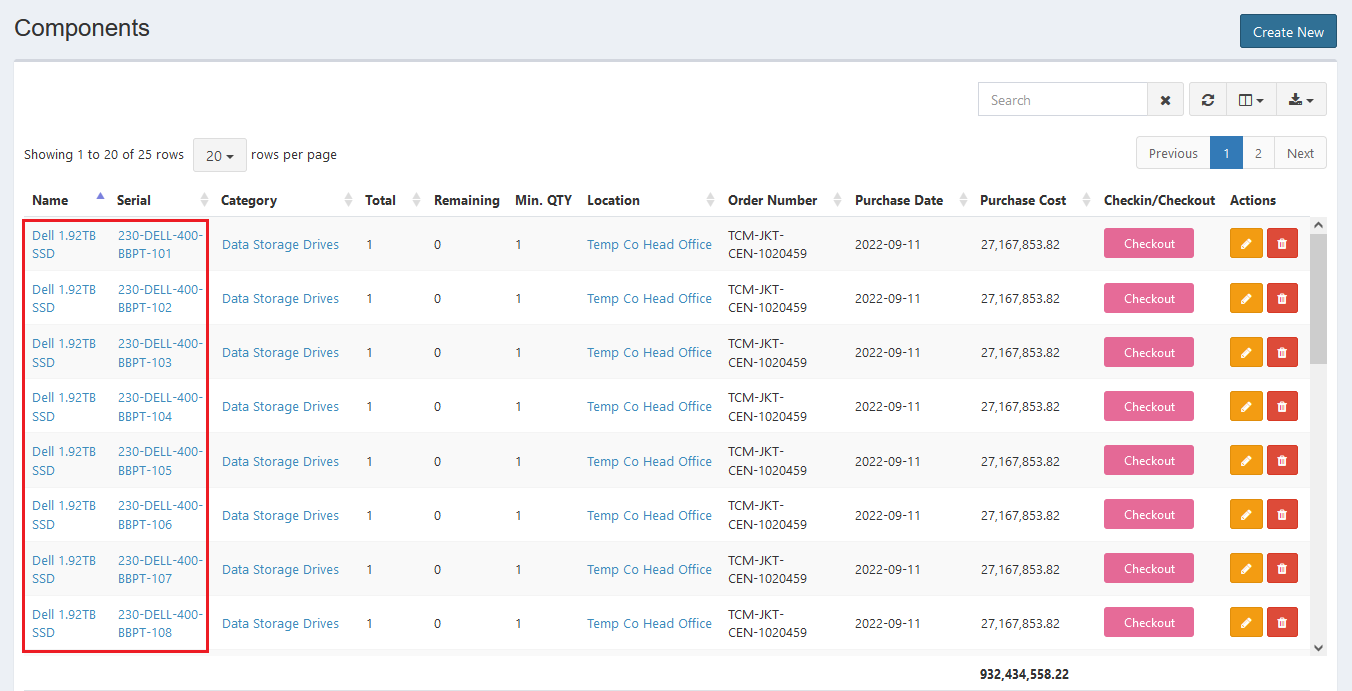
Components
Process Objective#
Components enables you to manage components records and checkout them to assets.
Overview#
Components are items that are part of an asset, for example HDD, RAM, etc.
Features and Functionality#
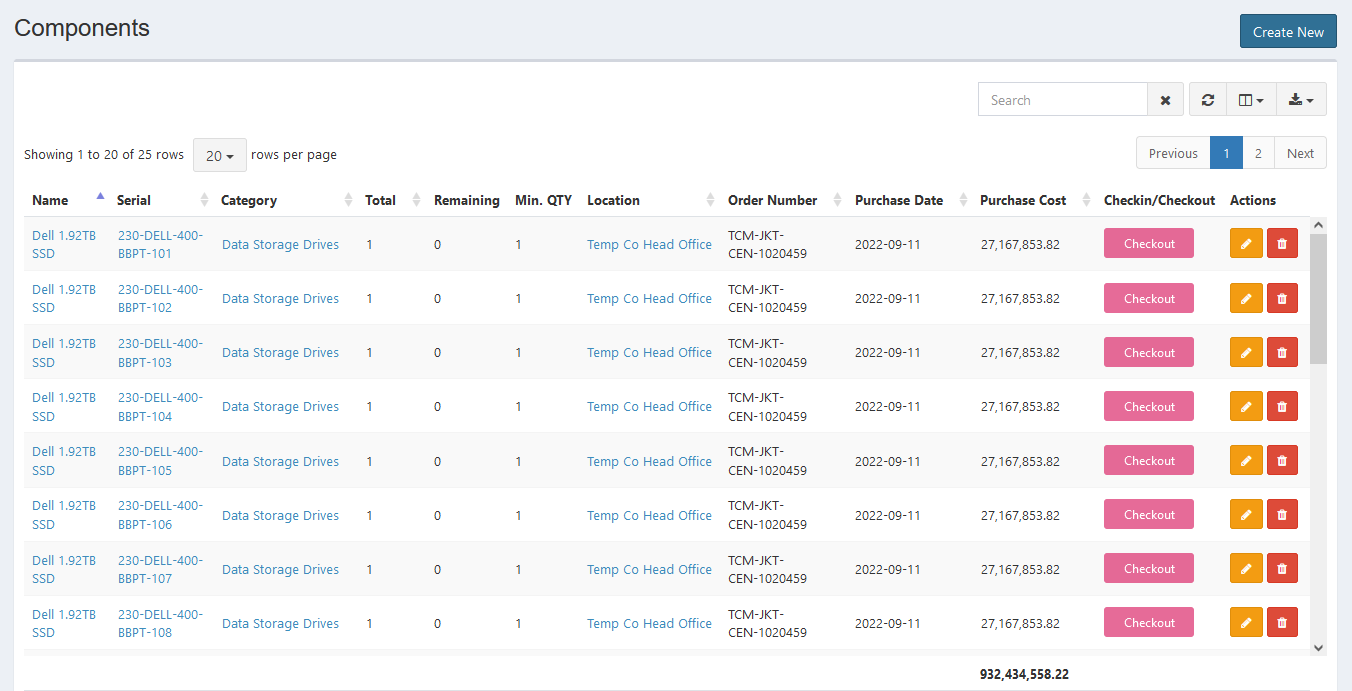
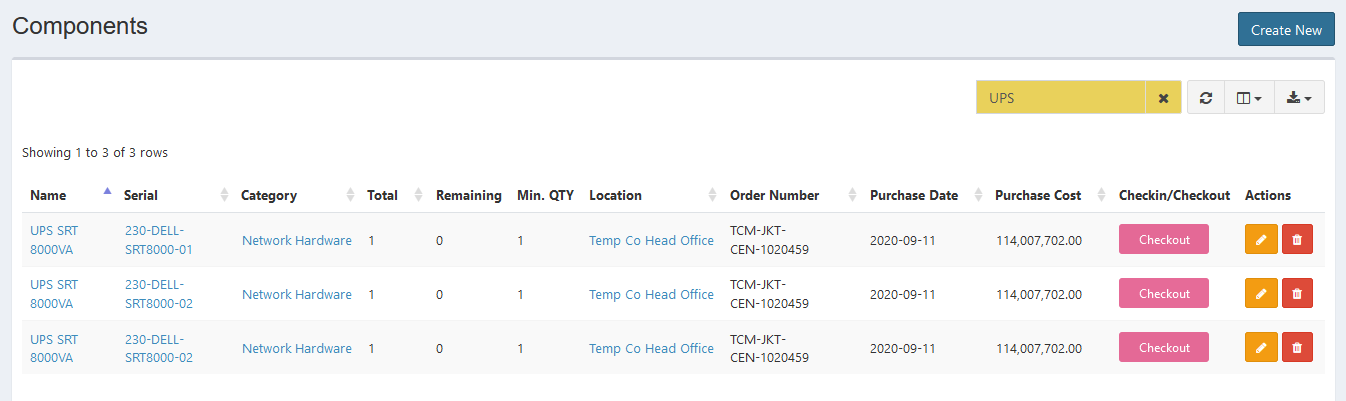
Here is the Components interface:
Create New Components#
You can create new component.
STEPS
- Press the Create New button on the top right corner of the tab.
Here is the Create Component interface:
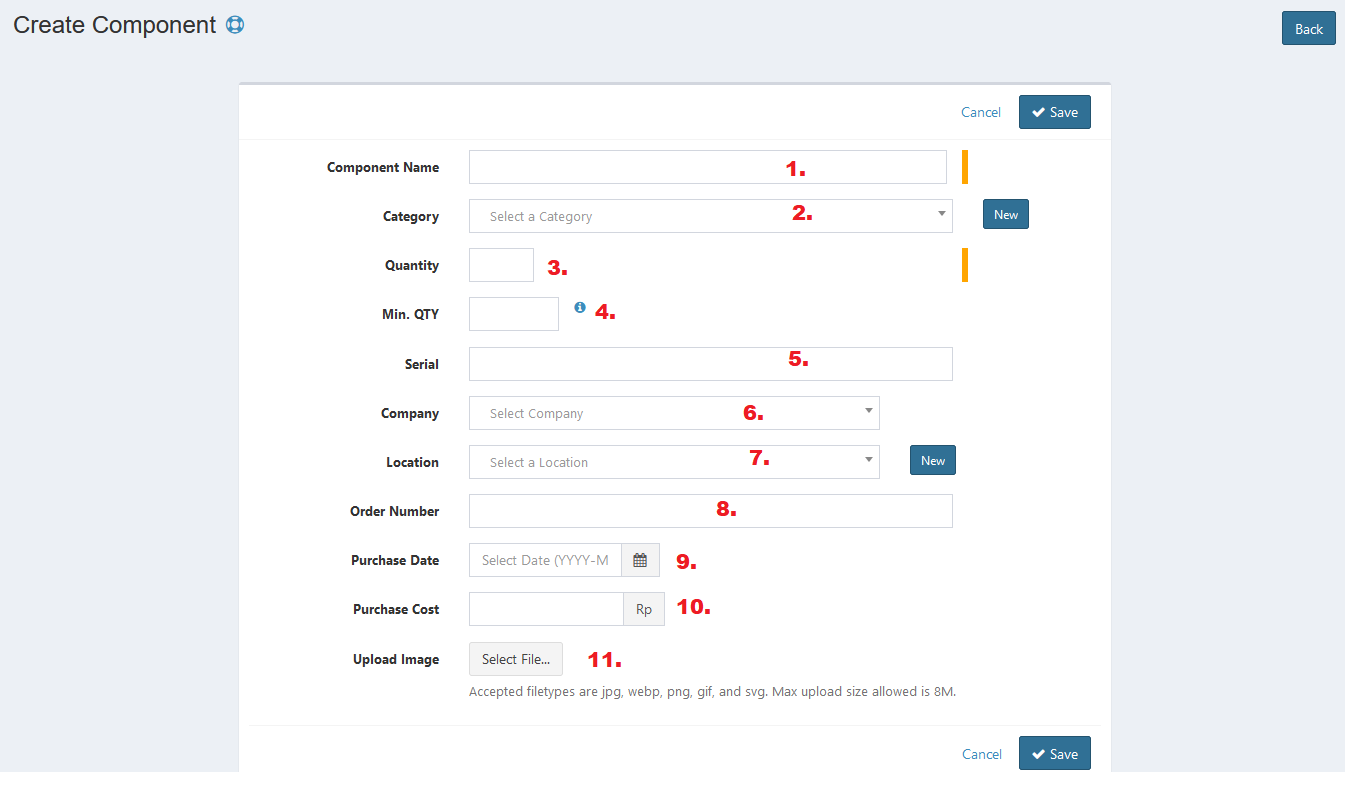
- Select company.
- Enter consumable name.
- Select category. You can also create new category by clicking the New button beside the field.
- Select manufacturer. You can also create new manufacturer by clicking the New button beside the field.
- Enter location. You can also create new location by clicking the New button beside the field.
- Enter model no.
- Enter item no.
- Enter order number.
- Set purchase date.
- Enter purchase cost.
- Enter quantity.
- Enter minimum quantity. This is the minimum number of items that should be available before an alert gets triggered.
- Upload image. Click the Select Image button, then select the images you want to upload from your local. See the instruction before uploading.
- Click Save button to finish your record.
- Click Cancel button to cancel your record.
- Click Back button to go back to the previous page.
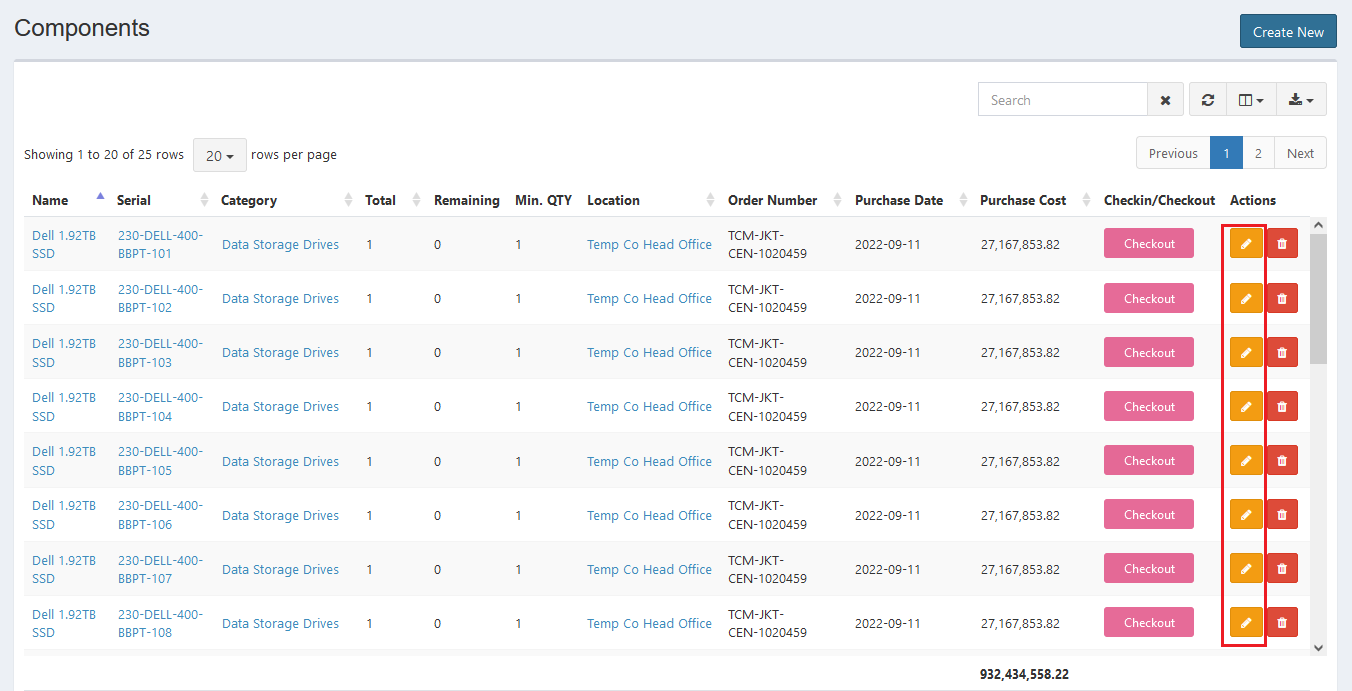
Update Components#
You can update your components record by clicking the update button in action column. The steps are the same with create new components.
Export#
You can export components records to CSV, MS-Excel, MS-Word, TXT, JSON, XML, and PDF by clicking the export icon, then select export format.

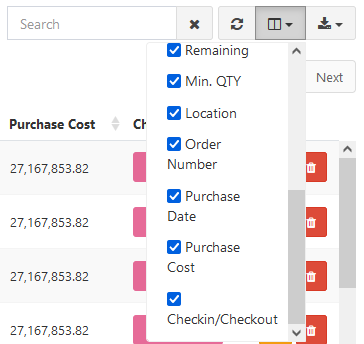
Set Column to Display#
There are 16 columns in components tab. You can select what columns to display here by clicking the column icon, then checklist the columns.
Refresh#
Click the refresh icon, and your record will be refreshed.

Search Components#
You can search your components record by typing in search field beside refresh icon. The system will automatically show the result. Click the close icon next to search field to cancel your search.
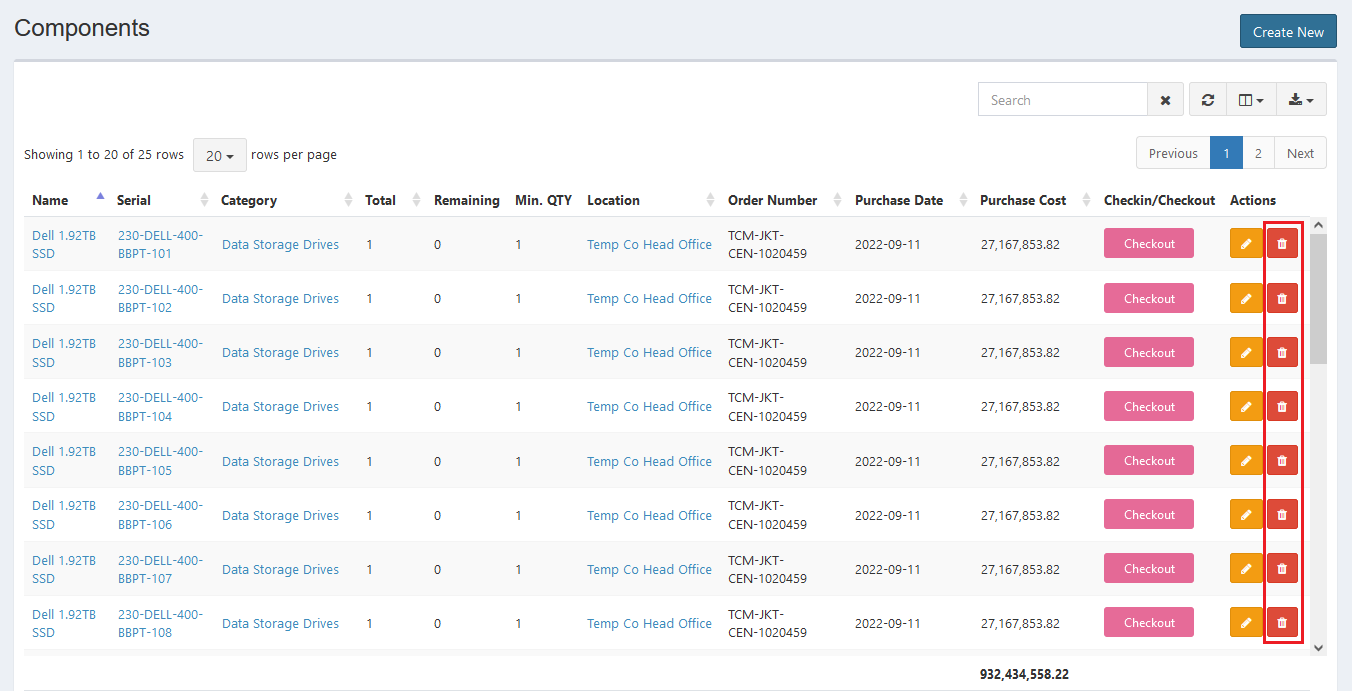
Delete Components#
You can delete components record by simply clicking the delete icon in action column.
Set Row to Display#
Set row to display feature will automatically appear when the number of records in a page is more than 10.
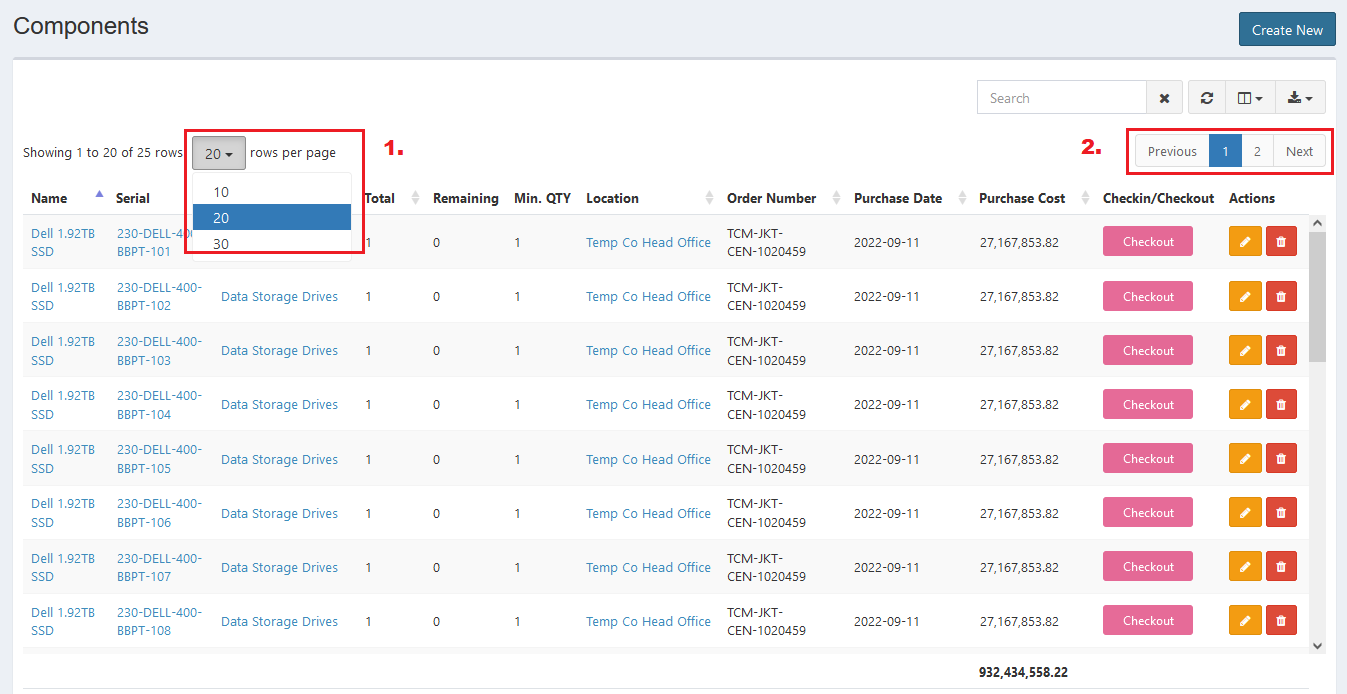
- Click the row number button, and choose the following 3 choices: 10 per page, 20 per page, and 30 per page.
- The blue numbered box displays your current page. Click any available button to access the other rows.
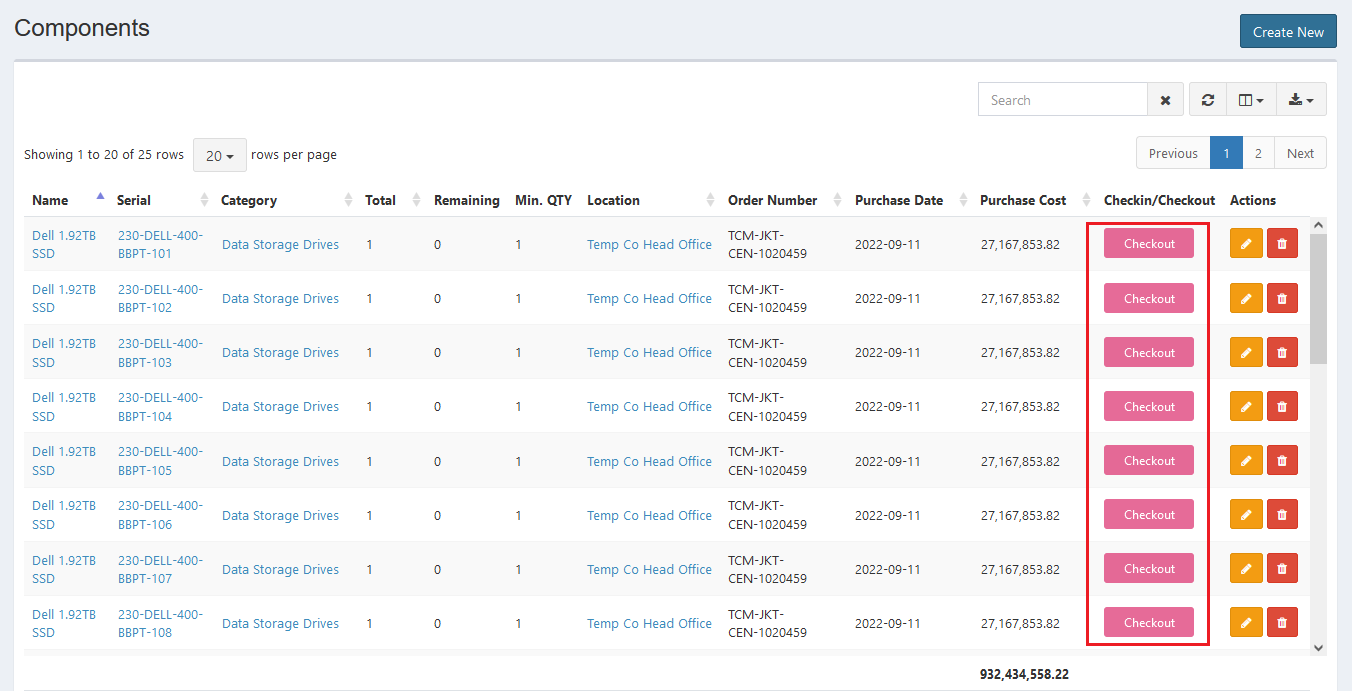
Checkout Components#
You can checkout components item to users.
STEPS
- Click the Checkout button in in/out column.
Here is the Checkout Component interface:
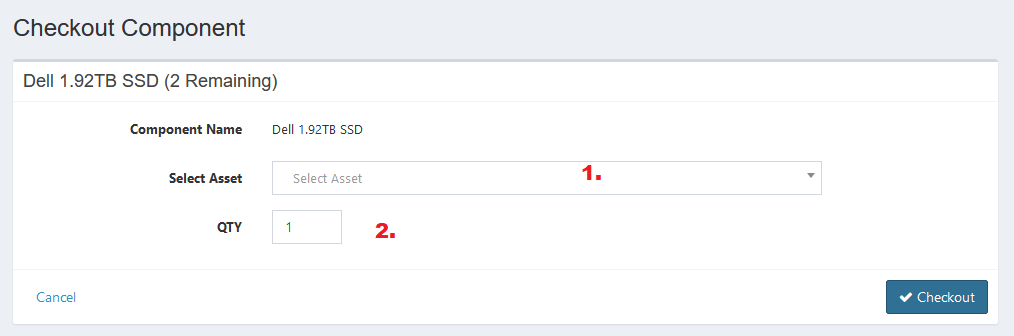
- Select asset.
- Enter quantity.
- Click Checkout button to finish.
- Click Cancel button to cancel checkout.
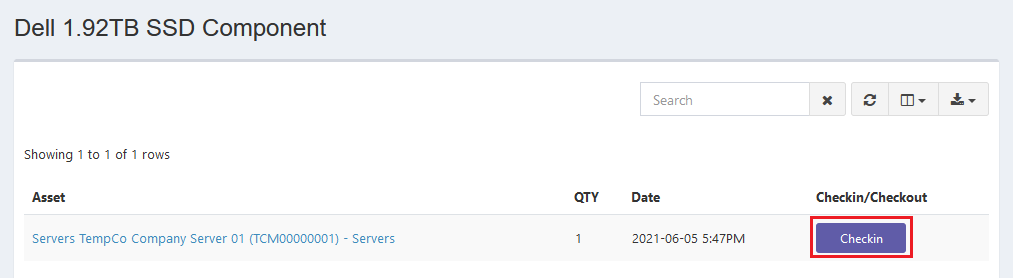
Checkin Components#
You can checkin the component item from asset.
STEPS
- Click the component name or serial you want to checkin, then click the Checkin button.
Here is the Checkin Accessory interface:
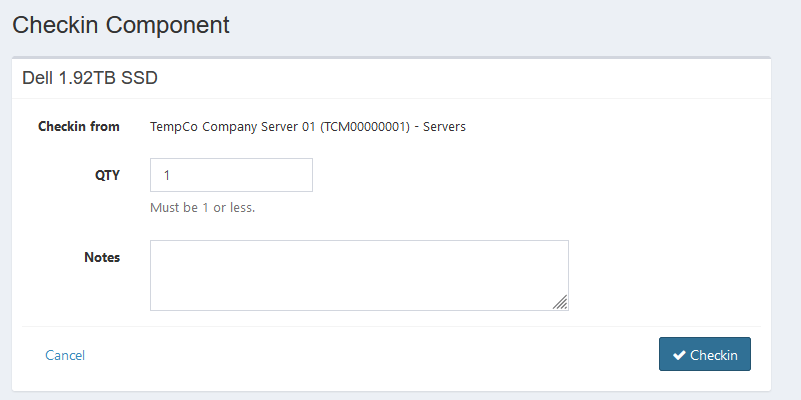
- Enter quantity.
- Enter notes.
- Click Checkin button to finish.
- Click Cancel button to cancel checkin.
Error Message#
- This is required field.

To save the record, you must fill the required field.
- Accepted filetypes are jpg, webp, png, gif, and svg. Max upload size allowed is 8M. Upload is file size MB.

Confirmation Messages#
- Are you sure you wish to delete Component Name?

This confirmation message will appear when you click the delete button. Click Yes button to continue or click Cancel button to cancel.