LDAP/AD
Process Objective#
LDAP/AD enables admin to update LDAP/AD settings.
Overview#
The LDAP functionality will import any users in your LDAP/Active Directory using the LDAP sync (in People > LDAP), and will update existing users. It will also allow users to use their LDAP credentials to login to ProTag.
Features and Functionality#
Here is the Update LDAP/AD Settings interface:
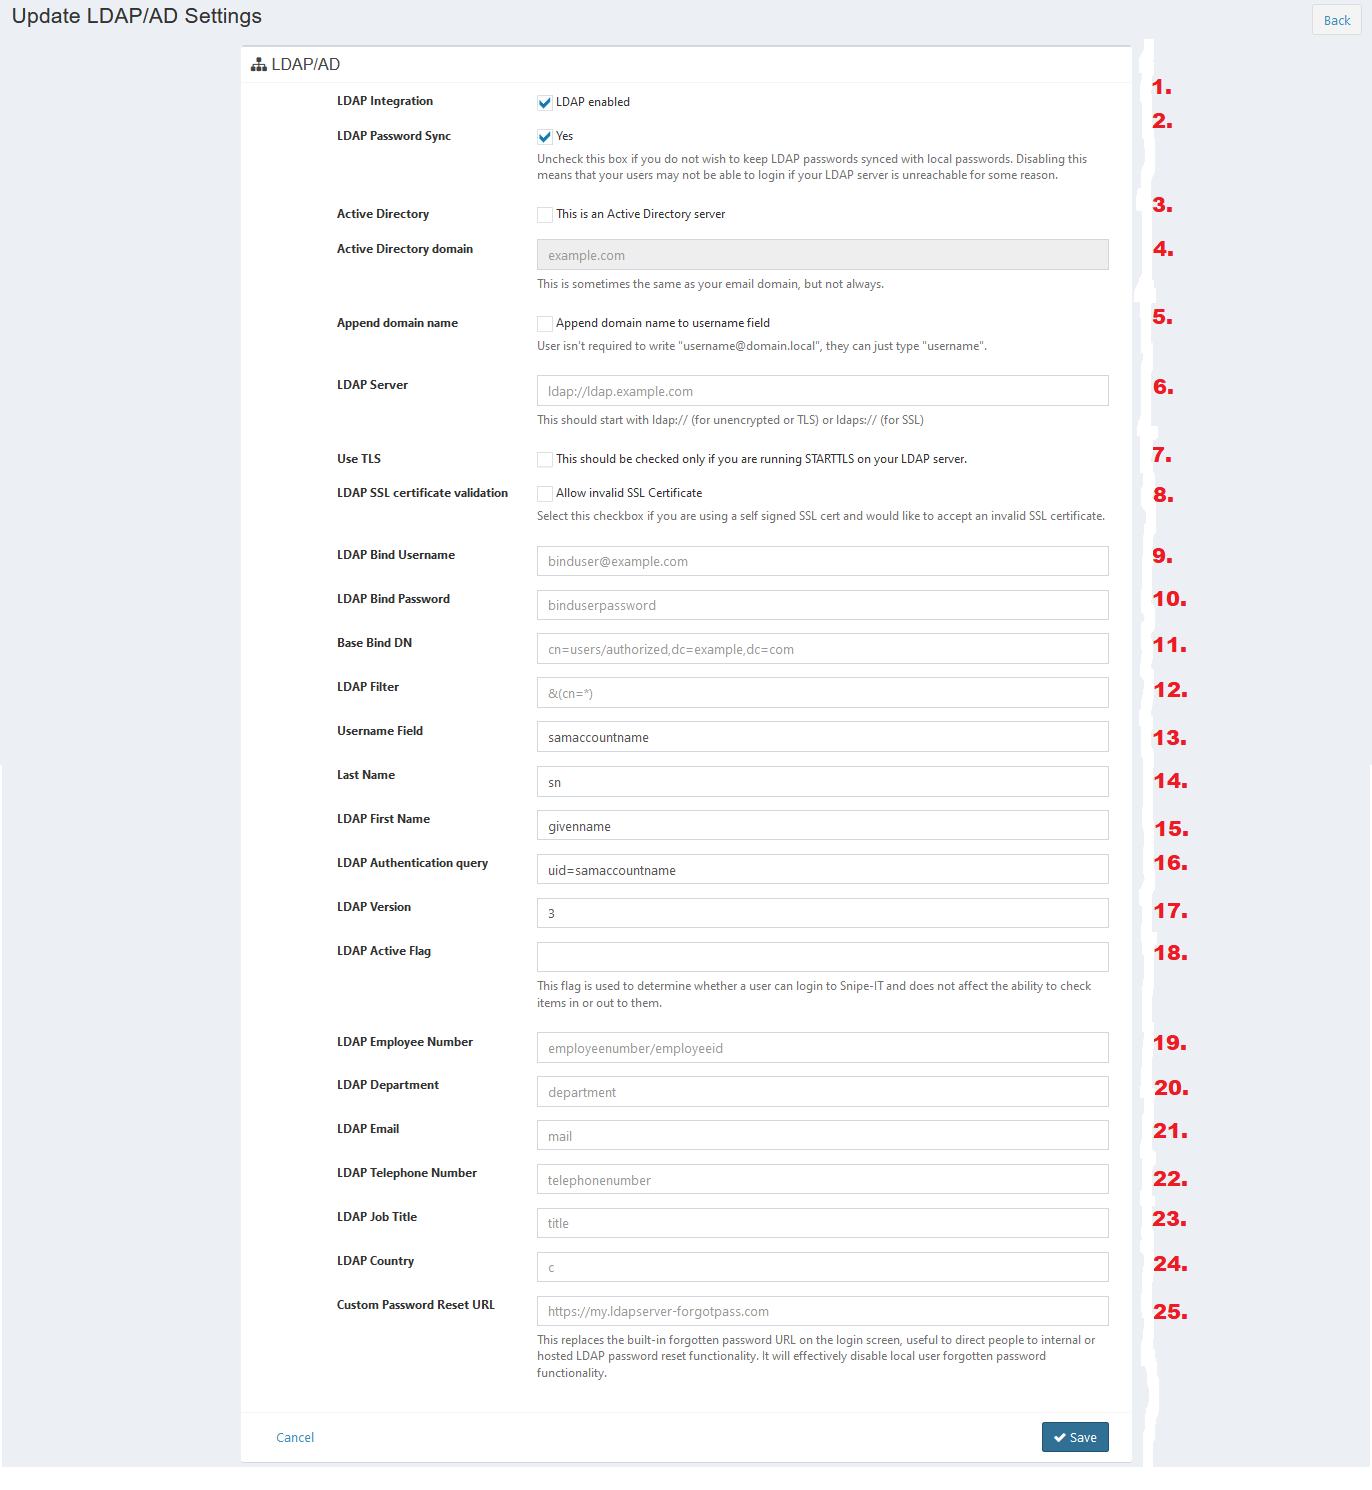
- Check the checkbox to enable LDAP integration.
- Check the checkbox to enable LDAP passwords synced with local passwords. Disabling this means that your users may not be able to login if your LDAP server is unreachable for some reason.
- Check the checkbox to enable ProTag as an active directory server.
- Enter active directory domain.
- Check the checkbox to append domain name to username field. User isn't required to write "username@domain.local", they can just type "username".
- Enter LDAP server.
- Check the checkbox to enable TLS. This should be checked only if you are running STARTTLS on your LDAP server.
- Check the checkbox to allow invalid SSL Certificate. Select this checkbox if you are using a self signed SSL cert and would like to accept an invalid SSL certificate.
- Enter LDAP bind username.
- Enter LDAP bind password.
- Enter base bind DN.
- Enter LDAP filter.
- Enter username field.
- Enter last name.
- Enter LDAP first name.
- Enter LDAP authentication query.
- Enter LDAP version.
- Enter LDAP active flag. This flag is used to determine whether a user can login to Snipe-IT and does not affect the ability to check items in or out to them.
- Enter LDAP employee number.
- Enter LDAP department.
- Enter LDAP email.
- Enter LDAP telephone number.
- Enter LDAP job title.
- Enter LDAP country.
- Enter custom password reset URL. This replaces the built-in forgotten password URL on the login screen, useful to direct people to internal or hosted LDAP password reset functionality. It will effectively disable local user forgotten password functionality.
- Click Save button to finish your record.
- Click Cancel button to cancel your record.
- Click Back button to go back to the previous page.