Branding
Process Objective#
Branding enables admin to update the the UI of Snipe-IT according to company's brand.
Overview#
Branding main features is to update the main UI of Snipe-IT according to the brand that the admin wants, such as giving new site name, uploading brand logo, and selecting UI skin.
Features and Functionality#
Here is the Update Branding Settings interface:
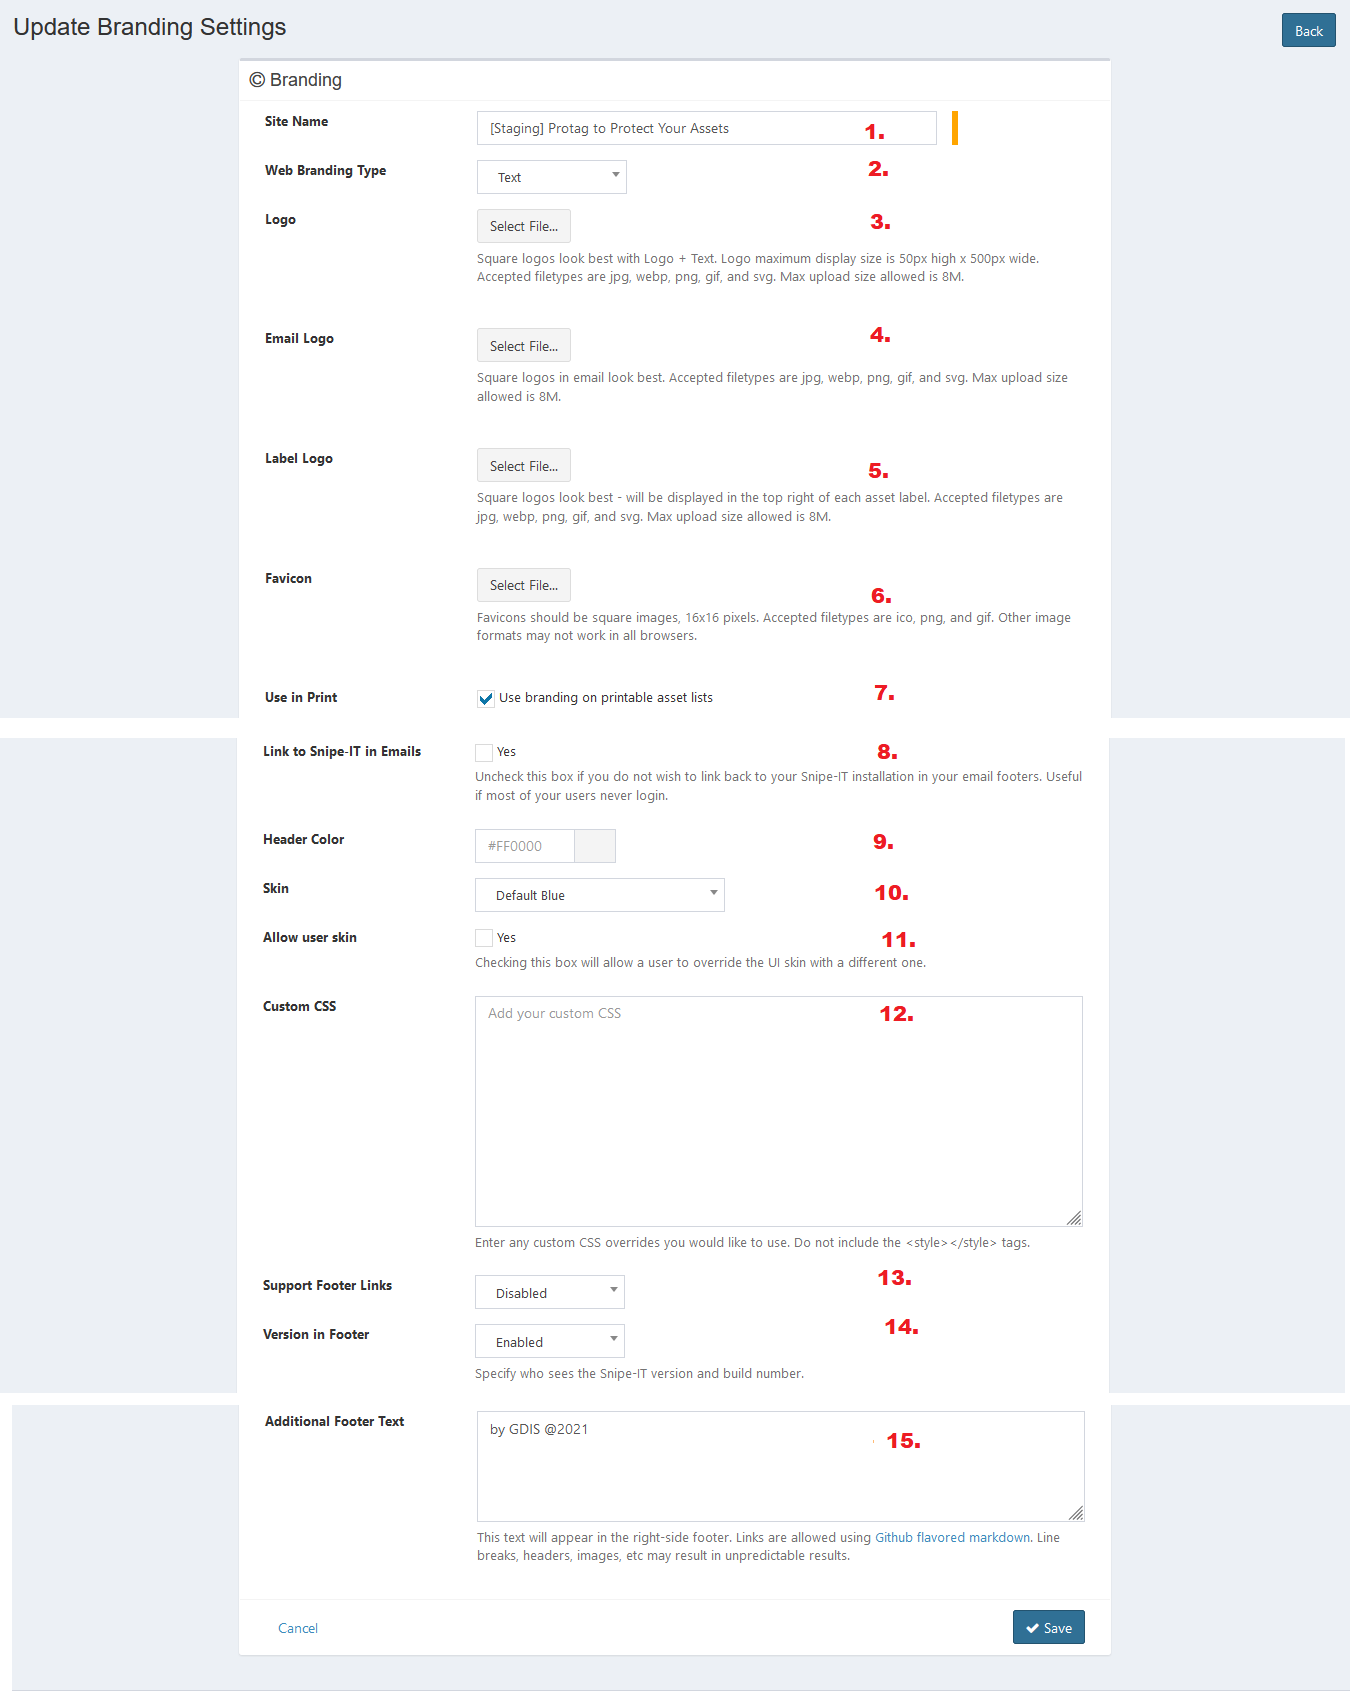
- Enter site name.
- Select branding type. You can select text, logo, or text + logo.
- Upload logo.
- Upload email logo.
- Upload label logo.
- Upload favicon.
- Check the checkbox to allow using branding in on printable asset lists.
- Check the Yes checkbox to allow linking to Snipe-IT in emails.
- Select header color.
- Select skin theme.
- Check the Yes checkbox to allow a user to override the UI skin with a different one.
- Add custom CSS.
- Select the status to show support footer links. You can select enabled, disabled, or superadmin only.
- Select the version of footer status to specify who sees the Snipe-IT version and build number. You can select enabled, disabled, or superadmin only.
- Enter additional footer text.
- Click Save button to finish your record.
- Click Cancel button to cancel your record.
- Click Back button to go back to the previous page.
Error Message#
- This is required field.

To save the record, you must fill the required field.
- Square logos look best with Logo + Text. Logo maximum display size is 50px high x 500px wide. Accepted filetypes are jpg, webp, png, gif, and svg. Max upload size allowed is 8M. Upload is file size MB.

Your uploaded image is too large. Upload image with 8 MB size or below.